 |
 |
 |
| Step 2: Cutting the Tubes |
 After a night of hardening, the tubes are ready to cut. After a night of hardening, the tubes are ready to cut.
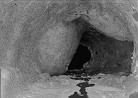
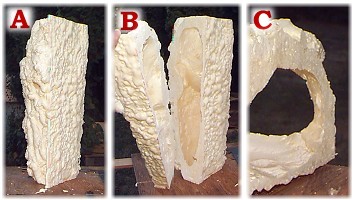
First, the ends were cut square with a hack saw, [A]. A digitally modified view through one of the cut ends, (inset, right), shows the remarkable similarity between the backyard tube and a real lava tube cave! Next, with the tube standing on one of the ends, a steel square was used to draw a straight line down, but slightly off-center of the tube. A permanent ink "Sharpie" type pen works best for this. Using this line as a guide, the entire length of the underside of the tube is cut with a razor-knife. The bottom of the tube is thin enough for the blade to go through cleanly. |
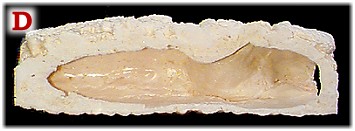 Using this cut as a guide, a hack saw blade is inserted through the bottom, and then into and through the "roof" of the tube. The foam material is soft enough to allow this. Care must be taken to make sure that the blade goes through at approximately 90 degrees from the "floor." Once the cut is started, it is a simple matter to saw down the length of the tube until the two pieces split, [B]. Since the original water balloon curved somewhat, the off-center cut exposed a flat oval hole in the tube, allowing for "corner columns" at either end for support, [C]. Viewed lengthwise, [D], our backyard lava tube is starting to take shape! The next step is filling in the rest of the "ground," surface crater detail work and painting it with the appropriate extraterrestrial color. Using this cut as a guide, a hack saw blade is inserted through the bottom, and then into and through the "roof" of the tube. The foam material is soft enough to allow this. Care must be taken to make sure that the blade goes through at approximately 90 degrees from the "floor." Once the cut is started, it is a simple matter to saw down the length of the tube until the two pieces split, [B]. Since the original water balloon curved somewhat, the off-center cut exposed a flat oval hole in the tube, allowing for "corner columns" at either end for support, [C]. Viewed lengthwise, [D], our backyard lava tube is starting to take shape! The next step is filling in the rest of the "ground," surface crater detail work and painting it with the appropriate extraterrestrial color. |


The Caves of Mars Project is funded by a NIAC Phase II Grant from the NASA Institute for Advanced Concepts.
Copyright © 2002-04 - Complex Systems Research; Inc. |