 |
 |
 |
| Step 5: Creating the Moon Mold |
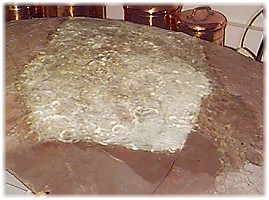 For creative crater work, we turned to the far side of the moon. The Oregon Museum of Science & Industry, (OMSI) had an eight-foot diameter Moon globe suspended from the ceiling in the lobby of the planetarium. After they moved to their new location, they decided to keep only the near side, and slices of the far side ended up in the OMSI dumpster. Two slices ended up in the hands of Oregon L5 Society member Bob McGown. These slices turned out to be perfect crater shapes for our lava tube model's lunar surface. For creative crater work, we turned to the far side of the moon. The Oregon Museum of Science & Industry, (OMSI) had an eight-foot diameter Moon globe suspended from the ceiling in the lobby of the planetarium. After they moved to their new location, they decided to keep only the near side, and slices of the far side ended up in the OMSI dumpster. Two slices ended up in the hands of Oregon L5 Society member Bob McGown. These slices turned out to be perfect crater shapes for our lava tube model's lunar surface.
Without this unique resource, another method of crater creation would be required. A simple method would be to use modeling clay, laying a layer down with varying sized bumps in a random arrangement. In the top of each bump, carve out a depression, then use the latex as described. |
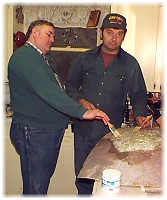 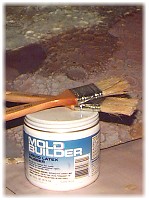 So, with a little muscle power, muliple layers of the latex mold goop was applied. Lava Tube Model Project Boss Dick Steffens was onhand to assist Bob McGown in the application of the goop. Up to eight layers need to be applied one after the other, with each layer drying in between applications. Once done, the mold will be pealed off the moon slice, trimmed, and used to mold the surface of our tube model. The mold will be cut to form a "crater tile" pattern that can be repeated as many times as needed to completely cover the surface. So, with a little muscle power, muliple layers of the latex mold goop was applied. Lava Tube Model Project Boss Dick Steffens was onhand to assist Bob McGown in the application of the goop. Up to eight layers need to be applied one after the other, with each layer drying in between applications. Once done, the mold will be pealed off the moon slice, trimmed, and used to mold the surface of our tube model. The mold will be cut to form a "crater tile" pattern that can be repeated as many times as needed to completely cover the surface. |


The Caves of Mars Project is funded by a NIAC Phase II Grant from the NASA Institute for Advanced Concepts.
Copyright © 2002-04 - Complex Systems Research; Inc. |